01 · Opening
Zippers & Pullers
Define whether the project concerns a pull tab, slider or complete zipper assembly. Consider the opening size, grip, connection and surrounding material.
Specify: component scope, dimensions and attachment.


Custom details · Coordinated development
Develop buckles, locks, zipper pullers and connecting fittings that work with your bag design. Veggance brings in-house hardware development and handbag manufacturing into one coordinated project.
For brands, design teams and collection buyers, the brief starts with your reference image, drawing or sample—and connects the shape, attachment and finish to the complete bag.
Planning the entire style? Explore our bag customization options.

Start with the parts your bag needs
Use the bag construction to define the hardware list. Custom handbag hardware and custom purse hardware may include closure parts, carrying fittings and small fasteners; each part needs a clear function, installation position and finish reference.
01 · Opening
Define whether the project concerns a pull tab, slider or complete zipper assembly. Consider the opening size, grip, connection and surrounding material.
Specify: component scope, dimensions and attachment.
02 · Closure
Compare magnetic snaps, turn locks, push locks and other handbag clasp types against the bag opening and backing construction.
Specify: opening action, panel thickness and mounting.
03 · Adjustment
Use bag buckles, strap adjusters, tri-glides and moving-bar fittings to control length and attachment.
Specify: strap width, thickness and adjustment range.
04 · Connection
D-rings, O-rings and swivel hooks connect straps, tabs and bag bodies. Clearance matters as much as the visible outline.
Specify: inner width, opening and movement space.
05 · Carrying
Review bag chains, metal handbag handles and attachment points as a complete carrying assembly.
Specify: length, connection, weight direction and intended use.
06 · Assembly
Bag feet, rivets, studs, screws and matching fixings support the finished construction and protect selected areas.
Specify: panel thickness, backing and visible finish.
Developing a separate metal logo or brand plate? Use our logo customization page for the branding direction, then coordinate its attachment and finish with the functional fittings.
When comparing bag hardware manufacturers or handbag hardware suppliers, review how the parts will be developed, approved and assembled with the bag—not only how they look in isolation.
A small component with a visible brand role
Custom zipper pulls connect the user’s hand to the zipper slider. A custom metal zipper pull can carry your shape or logo, but it also needs enough grip area and movement space to operate comfortably on the finished bag.
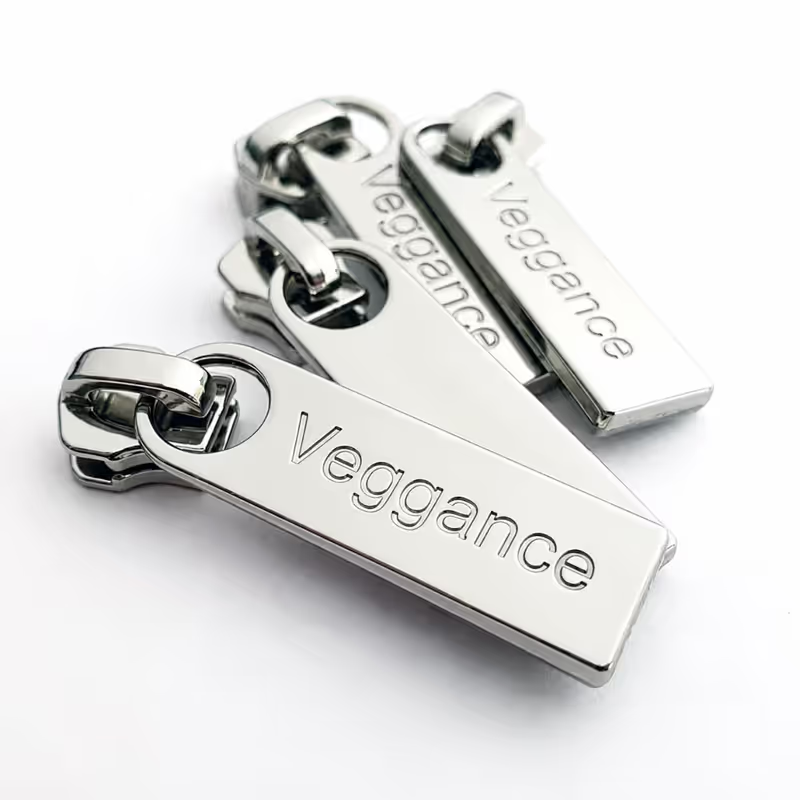
A zipper size alone does not confirm that a new puller will fit. Send a slider photo, dimensions or a physical reference alongside the design.
| Design direction | Information to provide | Sample review |
|---|---|---|
| Custom metal zipper pulls | Outline, thickness, logo artwork, connection and finish | Edge comfort, logo clarity, grip and movement |
| Custom leather zipper pulls | Requested leather or leather alternative, folded or flat construction, fixing method | Material thickness, connection and appearance on the bag |
| Rubber, soft PVC or silicone pullers | State the requested material separately, with hardness or hand-feel direction where relevant | Confirm the material, structure and sourcing route for the project |
| Woven, fabric or enamel details | Reference image, dimensions and the intended detail or fill | Confirm feasibility, attachment and appearance before selecting the route |
For custom zipper pulls with a logo, agree the visible face, raised or recessed detail and finish reference before sample approval. A separate logo plate can follow the metal branding brief while the functional puller remains part of this hardware project.
Choose the opening action with the bag structure
Handbag clasps influence how the bag opens, how the front panel looks and how the closure is supported inside. Compare purse clasp hardware and purse closure hardware against the actual opening, rather than selecting a metal clasp by appearance alone.
| Closure type | Opening and visual role | Details to specify |
|---|---|---|
| Magnetic snaps | A concealed or visible closing point for selected openings | Panel thickness, magnet position, backing and alignment |
| Turn locks | A visible lock detail with a rotating action | Lock face, catch plate, opening clearance and mounting holes |
| Push locks | A visible closure operated by a release action | Release direction, paired components, mounting and access |
| Press studs / snap fasteners | A compact press-to-close fastening direction | Material stack, backing support and positioning |
| Frame and kiss-lock constructions | A framed bag opening with a specific closure action | Frame geometry, bag pattern and assembly route; review feasibility for the project |
Record the panel thickness, holes or slots, fixing method and backing construction. Check whether the closure needs reinforcement or clearance from the lining and seam allowance.
Review the opening action, alignment and feel on an assembled sample. A loose magnetic handbag clasp or turn-lock sample does not show how it will behave once installed.
Choose the opening with the silhouette: compare custom handbag styles before finalizing the closure position and proportions.
Specify the connection, not just the outline
Bag strap hardware carries, adjusts and connects. Review purse strap hardware, rings for bags, swivel hooks, chains and metal bag handles with the strap, tab and bag body that they will join.
Fit dimension
Separate the inside opening from the overall outside dimensions. Match D-ring or buckle inner width to the strap or tab, then allow for the actual material thickness and movement.
Provide a dimensioned photo or drawing with the material stack.
Whole assembly
Check the hook opening, swivel direction, strap anchor point and clearance. Metal purse handles, chain straps and their end fittings should be reviewed together with the bag attachments.
Define intended use and any load or function requirements for the assembled bag.
| Part group | Dimensions and construction | What the sample should show |
|---|---|---|
| D-rings, O-rings and connecting rings | Inner width / diameter, section profile and tab thickness | Tab fit, movement and attachment position |
| Swivel hooks and strap adjusters | Hook opening, rotation, inner width and strap path | Clearance, adjustment and connection to the bag |
| Chains and metal handbag handles | Length, end connection, drop and weight direction | The complete carrying assembly on the bag |
| Feet, rivets, studs and bag screws | Visible dimensions, fixing length and panel stack | Backing support, edge feel and installation |
For a complete strap project, see custom bag straps. For a separate accessory project, explore custom key chains. Keep the component specifications and finish references connected across the collection.
Coordinate the base metal and visible surface
A material name and a surface color describe different decisions. Brass bag hardware refers to a base-material direction; an antique brass finish describes the visible surface. Do not use the finish name alone to specify the underlying metal.
| Decision | Directions to evaluate | Information to agree |
|---|---|---|
| Base material | Zinc alloy, brass or stainless steel, as appropriate to the requested part | Confirm availability, structure, weight, manufacturing route and target cost |
| Surface color | Gold, light gold, silver, gunmetal, antique brass or matte black directions | Approve a physical finish reference rather than relying only on a screen image |
| Texture and shine | Polished, brushed, matte or selected filled details | Review edge definition, logo clarity and compatibility with the part |
| Collection matching | Pullers, buckles, clasps, hooks and brand plates viewed as one set | Compare the approved finish plate and the actual parts under consistent lighting |
For high-end handbag hardware, assess the complete visual result: shape, weight, edge finish, attachment and consistency across the set. A finish that looks right on one flat plate still needs review on a curved hook or detailed puller.
Keep the approved hardware sample, finish reference and written description together. Confirm any market-specific material or coating requirements before selecting the production route.
A custom handbag hardware set with a logo should work with the wider branding plan. Use logo customization for the metal logo or nameplate design, then compare it beside the functional parts on the same bag.
Finish matching is an approval task across actual samples. Agree which reference controls the color, shine and texture before moving to bulk production.
From a reference to an approved assembly
Custom hardware development starts by making the intended part and its installation clear. Send drawings, CAD files, sketches or a sample; the first review identifies which dimensions, connections and finish details still need agreement.
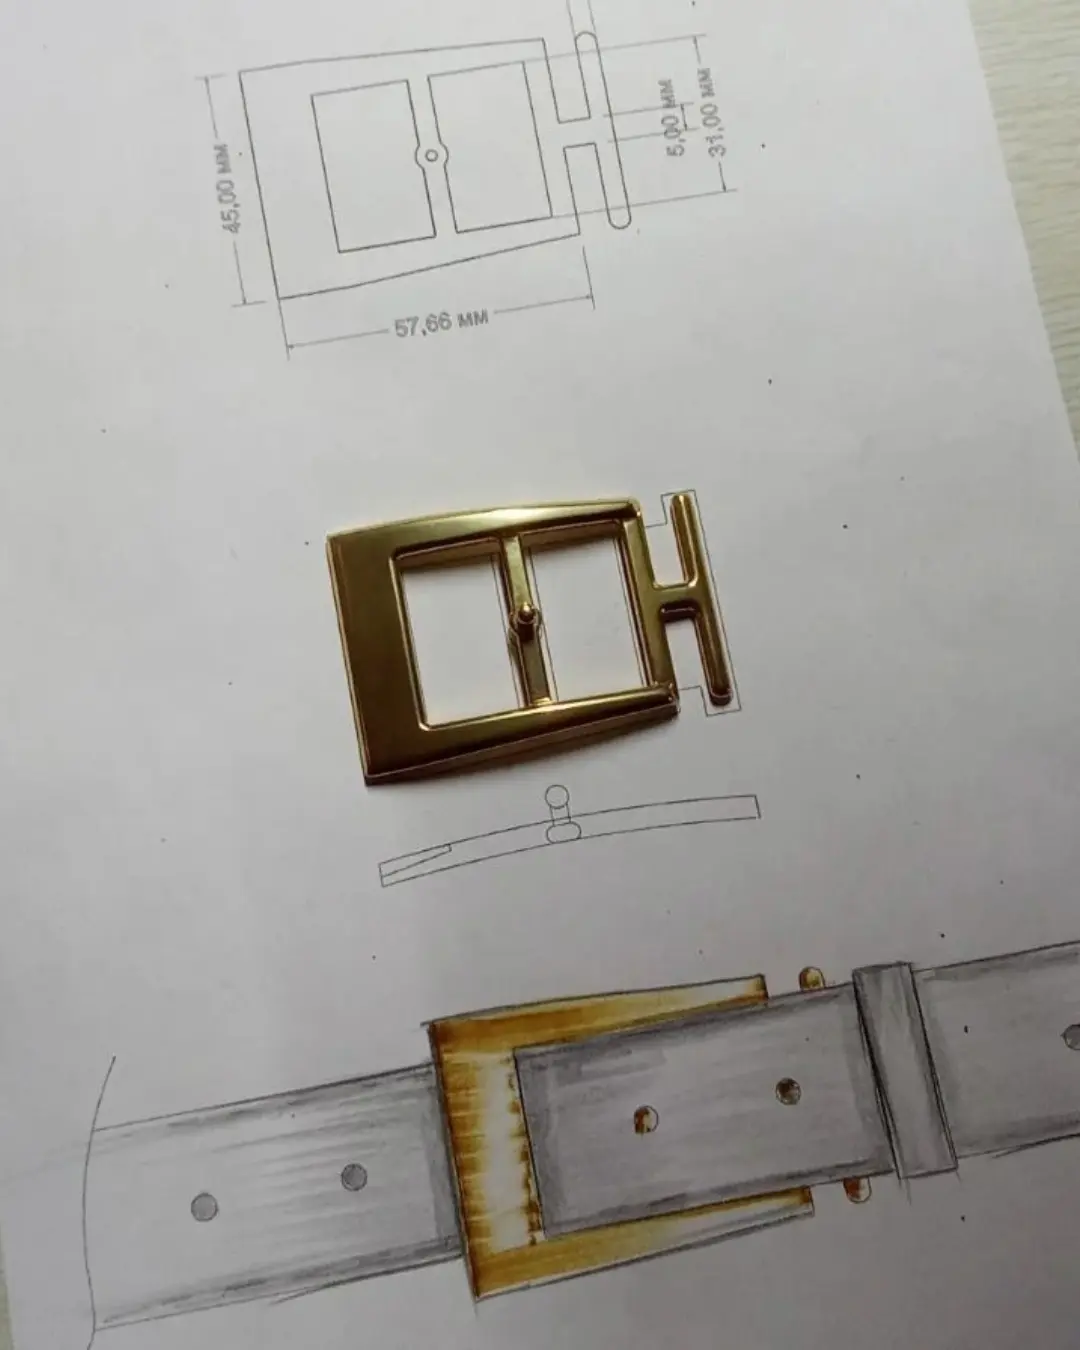
Review the hardware part list, attachment position and bag construction before discussing modification or custom bag hardware mold development. Confirm the outline, connection, logo area and key dimensions before tooling decisions.
A structural sample, metal sample and plated sample answer different questions. Record what each review approves, then check the selected part on the bag before final production approval.
01 · Brief
Identify the bag, installation position, component quantity and target appearance.
02 · Fit
Check dimensions, panel or strap thickness, clearances and mating parts.
03 · Drawing
Approve shape, connection and artwork positions against an identified drawing version.
04 · Tooling
Review an existing component, modification or new tooling, with its cost and ownership terms.
05 · Samples
Use the relevant physical samples to confirm structure, logo detail and surface reference.
06 · Assembly
Check the installed part and record the approved hardware sample with the written specification.
For the complete bag sample process, see Sampling & Prototyping. Confirm the hardware development schedule separately when new tooling, material changes or additional finish samples are involved.
Turn approved details into inspection references
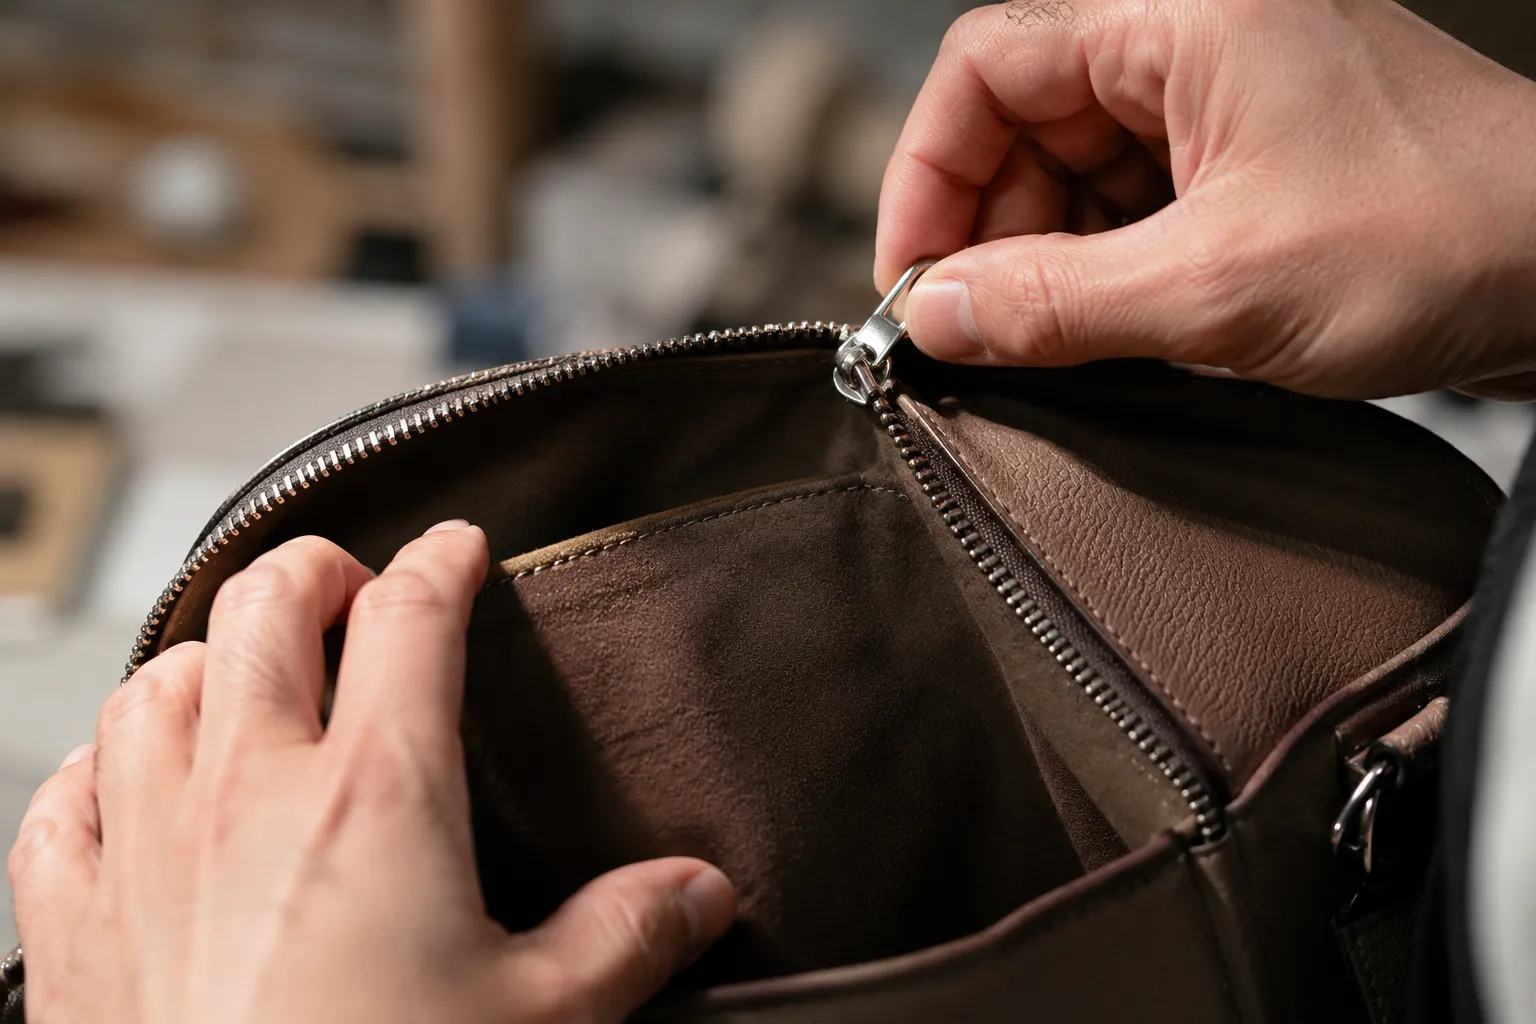
Bag hardware checks should connect the component to the approved bag construction. Review the visible finish and dimensions first, then assess the installed part against the agreed function and project requirements.
| Checkpoint | Reference to retain | Requirement to agree |
|---|---|---|
| Dimensions and connection | Approved drawing revision and component sample | Size, opening, mounting and mating-part fit |
| Surface and branding | Finish plate, approved hardware sample and logo artwork | Color direction, shine, texture, appearance and legibility |
| Operation and assembly | Assembled bag sample and agreed functional checks | Movement, opening action, alignment and attachment |
| Project-specific testing | Written method, limits and reporting requirements | Confirm whether salt spray, coating or force testing is needed and how it will be assessed |
| Protection and repeat orders | Packing instructions, part reference and change record | Prevent rubbing, tangling or pressure marks; reconfirm any changed part, material or finish |
For repeat orders, identify the approved part and finish before production planning. A changed connection, artwork or base material should be reviewed against the original approval, even if the outside shape appears similar.
See Quality Control for the wider inspection process, and share any buyer-specific test requirements with the project brief.
A useful quote starts with a clear breakdown
For a handbag hardware quotation, separate the quantity for each part, material, finish and design version. Different parts or colors may need different production arrangements, so confirm the bag hardware MOQ by finish and the bag hardware lead time for the actual project.
| RFQ item | What to send | Why it matters |
|---|---|---|
| Project scope | Bag style or reference; clarify whether hardware accompanies a bag order or is requested separately | The scope and feasibility of a separate component request need review |
| Part specification | Part name, drawing or photo, dimensions and installation position | Defines the component and connection that need pricing |
| Material and finish | Requested base material, physical color reference and texture | Affects the process route and sample requirements |
| Quantity per version | Pieces per part, design, finish and color, with expected bag quantity where relevant | Avoids assuming that different versions can share one minimum |
| Tooling and samples | Existing part reference or new design; required approval stages | Separates custom hardware tooling cost and sampling from the unit price |
| Required timing | Target sample review, production approval and delivery window | Separates development, bulk production and delivery preparation |
Shape, material, finish, order split and the tooling route can change the quote. Ask which costs cover the part, mold or tooling, samples, surface setup, special testing and protective packaging.
For wholesale or bulk requirements—such as custom zipper pulls or handbag clasps—include the quantity breakdown instead of only a total collection quantity.
Agree tooling ownership, storage, reuse and any exclusivity in writing. Confirm which drawing and samples are approved, what remains open and whether a design change affects cost or schedule.
Bag production quantities and sample schedules do not automatically define the terms for separate hardware development.
Prefer to send the brief directly? Contact our team with your reference images, quantities and target schedule.
Your hardware brief, connected to the bag project

I’m Tanya. I help coordinate your hardware requirements with the bag development team, so the shape, finish, attachment and sample comments stay connected to the complete design.
You can begin with a bag photo, a component reference or a drawing. I’ll help organize the missing details, follow up on sample revisions and keep the approved requirements clear for the next stage.
Learn more about my role in your handbag project.
A short brief is enough to start the review. We can organize the remaining specifications as the project develops.
 Optimized by Seraphinite Accelerator